Beyond Ugly Panels: The Need for an Invisible Solution
For many homeowners in row houses or semi-detached properties, the battle against noise pollution often feels like a choice between two evils: suffering through the sounds of your neighbor’s life or covering your living room in hideous, dust-collecting acoustic foam panels. While those egg-crate sponges might pass in a recording studio, they rarely fit the aesthetic of a finished dining room. The alternative—traditional soundproofing—is arguably worse. To install proper acoustic batting, you typically have to strip the room down to the studs.
The financial and logistical toll of this "tear-down" approach is significant. Recent data indicates that the average cost to demolish and rebuild interior walls can reach $3,000 per wall, with full-room gut renovations often exceeding $18,000 depending on finishes (Angi, "Cost to Remove a Wall"). This process involves weeks of drywall dust, disposal fees, and the headache of repainting and re-trimming your home. For most families, turning their living space into a construction zone simply isn't an option.
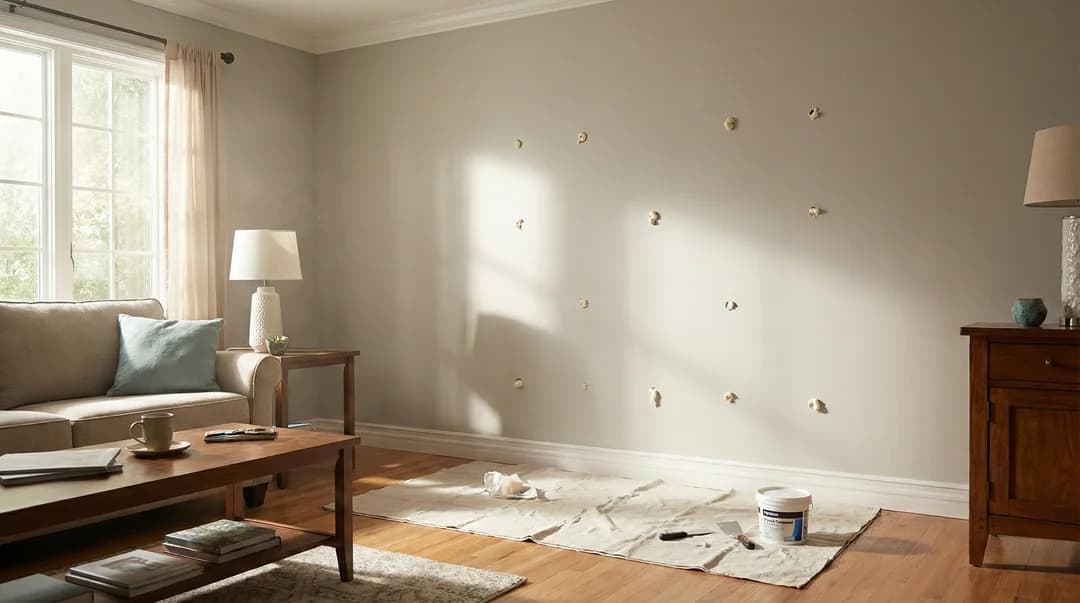
Enter the "Invisible Retrofit." This concept focuses on soundproofing existing walls without removing a single sheet of drywall. The industry has adopted a technique widely used in civil engineering: polyfoam grout injection. Originally designed as a heavy-duty solution for leveling sinking concrete slabs, this expanding polyurethane technology has been adapted for residential comfort. By injecting this high-density foam through dime-sized holes, you can fill the empty wall cavities that act as drum-like amplifiers for sound.
The science behind this retrofit is twofold: mass and sealing. Unlike fiberglass batts, which allow air (and sound) to pass through, expanding polyfoam creates an airtight barrier. This is critical because even microscopic air gaps can significantly compromise a wall's ability to block noise (Acoustiblok, "Sound Transmission Classes Explained"). By sealing these flanking paths and adding density to the structure, injection foam can reduce sound transmission through wall cavities by up to 80% compared to uninsulated walls (771 Foam, "Benefits of Injection Foam"). This allows you to achieve the silence of a major renovation with the invasiveness of hanging a picture frame.
Can Polyfoam Grout Really Soundproof Existing Walls?
When most homeowners hear "grout," they think of tile floors or patio stones. However, in the context of retrofit soundproofing, polyfoam grout refers to a high-density, expanding polyurethane injection material—often used for structural void filling—that has been repurposed as a powerful acoustic barrier. Unlike standard fluffy insulation that primarily traps heat, this solution works by fundamentally altering the wall's ability to transmit sound.
The effectiveness lies in two key mechanisms: air sealing and mass addition.
The Power of an Airtight Seal
The primary weakness in most row houses and older properties is air leakage. Sound travels through air; wherever air can pass, noise follows. A gap as small as 1% of a wall's surface area can reduce the wall’s sound-blocking efficiency by up to 50% (Commercial Acoustics, "Airborne vs Structure-Borne Noise"). When polyfoam grout is injected into the wall cavity, it expands to fill every crevice, sealing the microscopic gaps around electrical boxes, baseboards, and stud framing that fiberglass batts simply cannot reach.
High-Density Mass vs. Standard Insulation
Standard spray foam insulation is typically lightweight (about 0.5 lbs per cubic foot), which is great for thermal insulation but offers negligible mass for blocking noise. Polyfoam grout, by contrast, is engineered for density (often 3.0 to 4.0 lbs per cubic foot or higher). By injecting this denser material, you add significant mass to the wall assembly without removing drywall. According to the Mass Law of acoustics, doubling the weight of a wall significantly increases its ability to block airborne sound transmission.
Airborne vs. Structure-Borne Noise
It is critical to distinguish between the two types of noise pollution to set realistic expectations:
Airborne Noise (Voices, TV, Music): Polyfoam grout is highly effective here. The airtight seal and added mass work together to block sound waves from penetrating the wall.
Structure-Borne Noise (Footsteps, Bass, Slamming Doors): This noise travels through the solid framing (studs and joists) of the house. While the damping properties of polyurethane can reduce vibration resonance within the wall cavity (Blauert, "Insulation of Air- and Structure-Borne Sound"), no injection product can fully decouple the studs. You will notice a "muffling" of these sounds, but not total elimination.
Sealing Flanking Paths
Even with a perfectly filled wall, sound can "flank" or bypass the main barrier through weak points. The injection process naturally seals many of these hidden pathways inside the wall, but external gaps around outlets and vents remain critical. A 2024 industry report notes that sealing these flanking paths is essential, as they can compromise an otherwise high-STC (Sound Transmission Class) wall by allowing noise to leak through untreated gaps (771 Foam, "Injection Foam Acoustic Insulation").
Realistic Expectations: This retrofit solution offers a significant reduction in noise transfer—often described as turning "hearing your neighbor's conversation" into "hearing a faint mumble." It is a non-invasive alternative to tearing down walls, providing a 70-80% improvement in perceived quietness, but it should not be confused with building a soundproof recording studio.
The Physics of Foam: Open-Cell vs. Closed-Cell for Sound Dampening
When homeowners explore polyfoam grout soundproofing walls as a retrofit solution, the immediate assumption is often "the denser, the better." However, in the world of acoustics, density does not always equal silence. To understand why injection foam works, you must look at the microscopic architecture of the material: the difference between open-cell and closed-cell structures.
Open-cell foam is generally the superior choice for acoustic absorption in residential retrofits. Its structure consists of interconnected pockets that allow air—and sound waves—to enter the material. As sound energy travels through these tortuous paths, it encounters resistance, converting the acoustic energy into minute amounts of heat through friction (Technicon Acoustics, "Open Cell vs. Closed Cell"). This process effectively "traps" airborne noise (like voices or TV sound) and prevents it from reverberating inside the wall cavity.
In contrast, closed-cell foam consists of distinct, sealed bubbles. While this makes it an excellent moisture barrier and provides superior structural rigidity, that same rigidity can be a liability for soundproofing. A completely rigid foam core can act as a bridge, transmitting structural vibrations (footsteps, slamming doors) from one side of the wall to the other, rather than absorbing them (SoundAssured, "Open-Cell vs Closed-Cell"). For a retrofit wall soundproofing DIY project, using a high-expansion closed-cell product might inadvertently couple your drywall to the exterior sheathing, creating a direct path for flanking noise.
Selecting the Right Injection Material
For existing walls, the goal of injection foam insulation for sound is twofold: air sealing and resonance damping. By filling the empty cavity, you eliminate the "drum effect" where hollow walls amplify noise. While acoustic damping compounds (viscoelastic pastes applied between drywall layers) are effective at stopping vibration, they cannot address the hollow echo of an uninsulated bay without demolition. Injecting a specialized open-cell polyfoam bridges this gap, offering a non-invasive way to dampen airborne frequencies significantly more effectively than leaving the bay empty or using rigid fillers.
Aesthetics and Efficiency: Acoustic Foam Panels vs. Injecting Polyfoam
When homeowners first decide to tackle noise pollution, the most common impulse is to purchase "egg crate" acoustic foam panels. While these panels are a staple in recording studios, they are often the wrong tool for residential soundproofing. It is critical to distinguish between sound absorption (reducing echo within a room) and sound isolation (blocking noise from entering or leaving). According to industry experts, surface-mounted treatments generally improve internal acoustics but fail to block sound transmission effectively, whereas adding mass and density inside the wall is required for true isolation (Acoustical Surfaces, "Soundproofing vs Sound Absorbing").
Visually, the difference is stark. Acoustic panels impose a "studio industrial" aesthetic that rarely blends with a finished living room or bedroom. They also encroach on valuable living space, gathering dust and requiring regular cleaning. More concerning is their longevity; surface-mounted acoustic foam is susceptible to UV damage and oxidation, often sagging, discoloring, or crumbling within 5 to 10 years (Prance Building, "Wall Soundproof Panels Vs Acoustic Foam"). In contrast, injecting polyfoam grout into existing wall cavities is an invisible retrofit. It utilizes the empty "dead air" space inside your studs, preserving your square footage and interior design.
From a cost-benefit perspective, injection offers a permanent structural improvement rather than a temporary surface fix. Standard interior walls typically have a Sound Transmission Class (STC) rating of 33-39, which offers little resistance to loud neighbors or street traffic. Retrofitting these cavities with injection foam insulation can elevate that rating to STC 50 or higher, significantly reducing noise transfer without the expense of tearing down drywall (771foam, "Benefits of Injection Foam"). By filling the voids where sound waves resonate, polyfoam grout treats the problem at its source—inside the wall—providing a solution that lasts as long as the building itself.
The Process: How Do I Inject Expanding Foam Into My Walls?
For homeowners dealing with thin party walls in row houses or semis, the idea of tearing down drywall to install acoustic batts is often a dealbreaker. This is where the "drill and fill" method comes in—an unexpected retrofit hack that adapts the concept of polyfoam grout soundproofing walls (typically used for concrete void filling) into a residential insulation solution. By injecting a slow-rise polyurethane foam into your existing wall cavities, you can seal the air gaps that allow high-frequency noise to leak through, all without major demolition.
1. Map Your Wall Bays
Before drilling, you must "see" inside the wall. Use a high-quality stud finder to locate every vertical stud and mark the center of each bay. It is critical to identify obstructions like fire blocks, plumbing pipes, or electrical wires. While injection foam flows around wires, drilling into a live wire poses a severe safety risk. For older homes with unpredictable framing, some contractors recommend using a thermal camera or a small inspection scope to verify the bay is empty before proceeding.
2. The 'Drill and Fill' Technique
Once mapped, drill small access holes—typically 5/8-inch to 1-inch in diameter—into the drywall. You will generally need one hole near the top of the wall and one near the middle for each stud bay to ensure even distribution. These holes are small enough to be easily patched but large enough to accommodate the injection tube.
3. Injection and Timing
This is the most critical step. Unlike the high-expansion foam used for sealing windows, retrofit soundproofing requires a low-expansion or slow-rise injection foam. These foams are designed to fill the cavity gently without exerting enough pressure to bow or crack your drywall. When applied correctly, this method is surprisingly effective; reports indicate that injection foam can reduce sound transmission through wall cavities by up to 80% compared to empty walls (771 Foam, "Discover the Benefits"). Insert the tube and fill slowly, pausing to let the foam expand. If you rush, you risk "blowout," where the pressure forces the drywall off the studs, a risk highlighted by insulation safety experts (All Type Insulation, "Dangers and Risks").
4. Patching and Painting
After the foam cures (usually within an hour), shave off any excess that oozed out of the injection ports. Use a quick-drying spackle to fill the holes, sand flush, and repaint. Because you preserved the original drywall, the wall returns to its pristine condition, now with a hidden acoustic barrier against neighbor noise.
Tools Required for a Retrofit Wall Soundproofing DIY Attempt:
Stud Finder & Voltage Detector: To map bays and avoid electrical hazards.
Drill with Hole Saw Bit: Sized to your specific foam injection nozzle (usually 5/8" to 1").
DIY Injection Foam Kit: Ensure it is specified as "Slow Rise" or "Retrofit" foam (Open-cell is often preferred for acoustics).
Drywall Spackle & Putty Knife: For restoring the drill sites.
Drop Cloths & PPE: Expanding foam is incredibly sticky and difficult to remove from floors or skin.
Critical Risk Assessment: Will the Foam Expand and Damage My Drywall?
The most common fear homeowners face when considering polyfoam grout soundproofing walls is the potential for structural damage. This fear is not unfounded; if you inject a high-expansion material into a sealed cavity without an escape route, the hydraulic pressure can easily bow or even crack standard ½-inch gypsum board. Understanding the physics of foam expansion is the difference between a successful sound barrier and a costly drywall repair bill.
The danger lies in the expansion ratio and "rise time" of the product. Standard insulation foams are often "fast-rise," designed to expand immediately upon leaving the nozzle to fill open stud bays. When these formulas are forced into a closed wall, they generate significant outward pressure. In contrast, professionals and savvy DIYers use specific "slow-rise" or "injection foam" formulas. These mixtures remain in a liquid state for nearly a minute, allowing gravity to pull the material to the bottom of the stud cavity before it begins a gentle, controlled expansion (Foam It Green, "Fast Rise Vs. Slow Rise Foam").
Warning: Avoid The "Hardware Store" Trap
Do not attempt to soundproof a large wall cavity using off-the-shelf "gap and crack" cans (like Great Stuff) from a local hardware store. These are typically one-component foams that rely on atmospheric moisture to cure. Inside a dry, enclosed wall cavity, these foams often fail to cure properly, leaving a gooey mess that offers zero acoustic value, or they expand unpredictably, exerting pressure that exceeds the flexural strength of drywall (RetroFoam, "Low-Pressure vs. High-Pressure Spray Foam").
To mitigate pressure risks during a retrofit project, follow these relief techniques:
Drill Pressure Relief Holes: You must drill a series of small holes (approx. 1/8 inch) at the top of the stud bay. This allows excess air and expanding gas to escape rather than pushing against the drywall panels.
Calculate Cavity Depth: Ensure you are using a formula calibrated for 2x4 or 2x6 enclosed cavities. Overfilling even a slow-rise foam can lead to "bowing," where the drywall pushes outward creating a visible hump.
Work in Lifts: For taller walls, inject the foam in stages (or "lifts"), allowing the bottom section to cure and stabilize before adding weight and pressure on top of it.
The Verdict: Is This a DIY Project or Do I Need a Professional?
For many homeowners, the allure of grabbing a DIY spray foam kit (often called a "Froth-Pak") from the hardware store is strong. It feels like a cost-effective "hack" for polyfoam grout soundproofing walls without the markup of a contractor. However, when you are dealing with a retrofit application—injecting material blindly into finished wall cavities—the difference between a successful sound barrier and a structural nightmare often comes down to equipment precision and chemical composition.
The Equipment Gap: Pressure and Consistency
The primary difference between a DIY kit and a professional rig lies in pressure and temperature control. DIY kits typically operate as "low-pressure" systems. While excellent for sealing small gaps or "flanking noise" around windows, these kits often struggle to maintain a consistent mixing ratio over large volumes. According to industry analysis, low-pressure systems are prone to clogging if the application is paused, and inconsistent mixing can lead to foam that fails to cure properly (RetroFoam, "Low-Pressure vs. High-Pressure Spray Foam"). In contrast, professional rigs monitor the chemical temperature and pressure in real-time, ensuring the polyfoam grout cures with the correct density for maximum acoustic damping.
Risk Factor: The "Exploding" Drywall
Perhaps the most significant risk in a DIY retrofit is managing the expansion rate. Standard expanding foam found in hardware stores is often designed to expand aggressively to fill open voids. When injected into a closed stud bay, this rapid expansion can exert enough pressure to bow or even crack your drywall. Professional injection foam is formulated to have a consistency closer to "shaving cream"—flowing gently around obstacles before setting, rather than expanding violently (Indiana Spray Foam, "Will Injection Foam Damage My Walls?"). This gentle flow is critical when you are trying to achieve soundproofing existing walls without removing drywall, as it ensures the void is filled without compromising the wall's integrity.
When to DIY vs. When to Call Black Birch
There is a time and place for DIY solutions. If you are sealing visible gaps, insulating a single stud bay in a detached garage, or treating a small area where finish quality isn't paramount, a DIY kit may suffice. However, for habitable rooms in row houses or semis, the variables increase.
Acoustic Performance: To achieve significant noise reduction (up to an 80% reduction in transmission), the foam density must be uniform throughout the wall (771 Foam, "Benefits of Injection Foam"). Gaps left by poor flow in a DIY job create "sound bridges" that ruin the effect.
Electrical Safety: Wiring embedded in insulation dissipates heat less effectively. Professional installers understand how to assess wire gauges and load requirements to prevent overheating risks, a nuance often overlooked in DIY attempts (Foam Works, "When You Spray Foam over Electric Wires").
Final Thoughts on Safety
Regardless of the method, safety is non-negotiable. Polyurethane products release chemicals during the curing process. The EPA advises that strict ventilation protocols—exhausting air directly outside and isolating the work area—are essential to prevent exposure to isocyanates (EPA, "Spray Polyurethane Foam Safety"). For whole-room projects, utilizing a professional team ensures these ventilation standards are met, protecting your family’s air quality while we protect your peace and quiet.
Don’t let the sounds of your neighbors disrupt the comfort of your own home. You can achieve professional-grade silence without the dust, debris, or "egg-crate" eyesores of traditional methods. Contact Black Birch Contracting today to schedule a consultation and reclaim the quiet sanctuary you deserve with our non-invasive injection foam technology.